

How To Download And Install Davinci Resolve
On Mixkit, we offering a variety of different creative assets for you to use inside DaVinci Resolve.
However, the file type provided may vary depending on the type of nugget y'all've downloaded. This how-to medico is for DaVinci Resolve users who take downloaded the gratis DaVinci Resolve .comp or .dpr files from Mixkit and are gear up to import into DaVinci Resolve to start creating!
Before we begin, you lot will need to have the latest version of DaVinci Resolve installed. Previous knowledge and feel of using DaVinci Resolve will certainly help but we've designed our files to be easily edited, and then let's get started.
To follow along y'all tin can download:
– The .comp file Blithe Line Lower Third
– The Twist Bike Transition (.dpr) file
Importing .comp files into DaVinci Resolve
This applies to both the Windows and Mac versions of DaVinci Resolve.
Let's wait at how to load a Fusion .comp file into DaVinci Resolve. First, you lot'll need to open up a new or existing project. Once you have that head over to the "Edit" tab of the DaVinci interface.
Make sure the "Media Pool" is active. You'll find this in the top left of the user interface. At present right-click anywhere within the media pool and choose "New Fusion Composition" from the card. In the following popular-up interface choose the desired length of between 5 and x seconds and the frame charge per unit you would like. While all of our DaVinci Resolve .comp files were created in 29.97, you can arrange them to your projection requirements as needed.

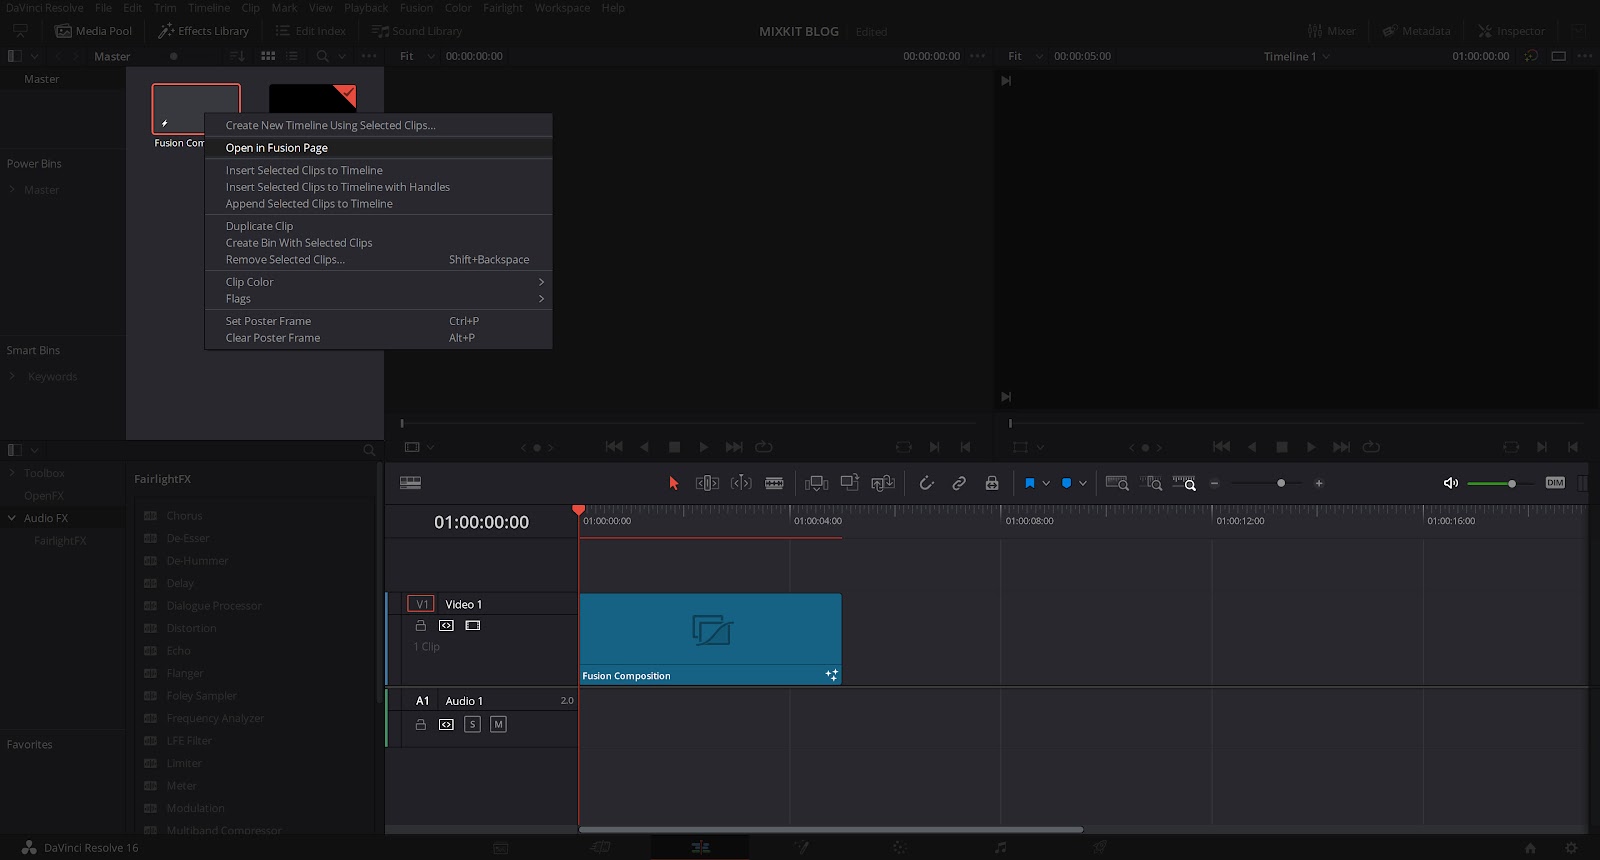
With this finished, you'll see the newly created Fusion Limerick file in the pool and from here y'all'll need to elevate and drop the file into the timeline. It will be empty for at present so yous tin can alter that past correct-clicking on the Fusion Limerick inside the media puddle and choosing "Open in Fusion Page".
If you're unfamiliar with the Fusion page of DaVinci Resolve, it's the magic wand located in the navigation bar which runs along the bottom of the user interface. Hither you lot'll be creating motion graphics, animated text, and adding other special effects to your projects. For now, we're going to focus on how to import the .comp file.
Inside the Fusion page of DaVinci Resolve, you'll see just a unmarried node called MediaOut1. This is generated by default when a new Fusion Limerick is created. You tin can ignore it for at present and instead you'll want to caput upwards to File from the main navigation and choose "Import Fusion Limerick" from the driblet-downwardly menu.
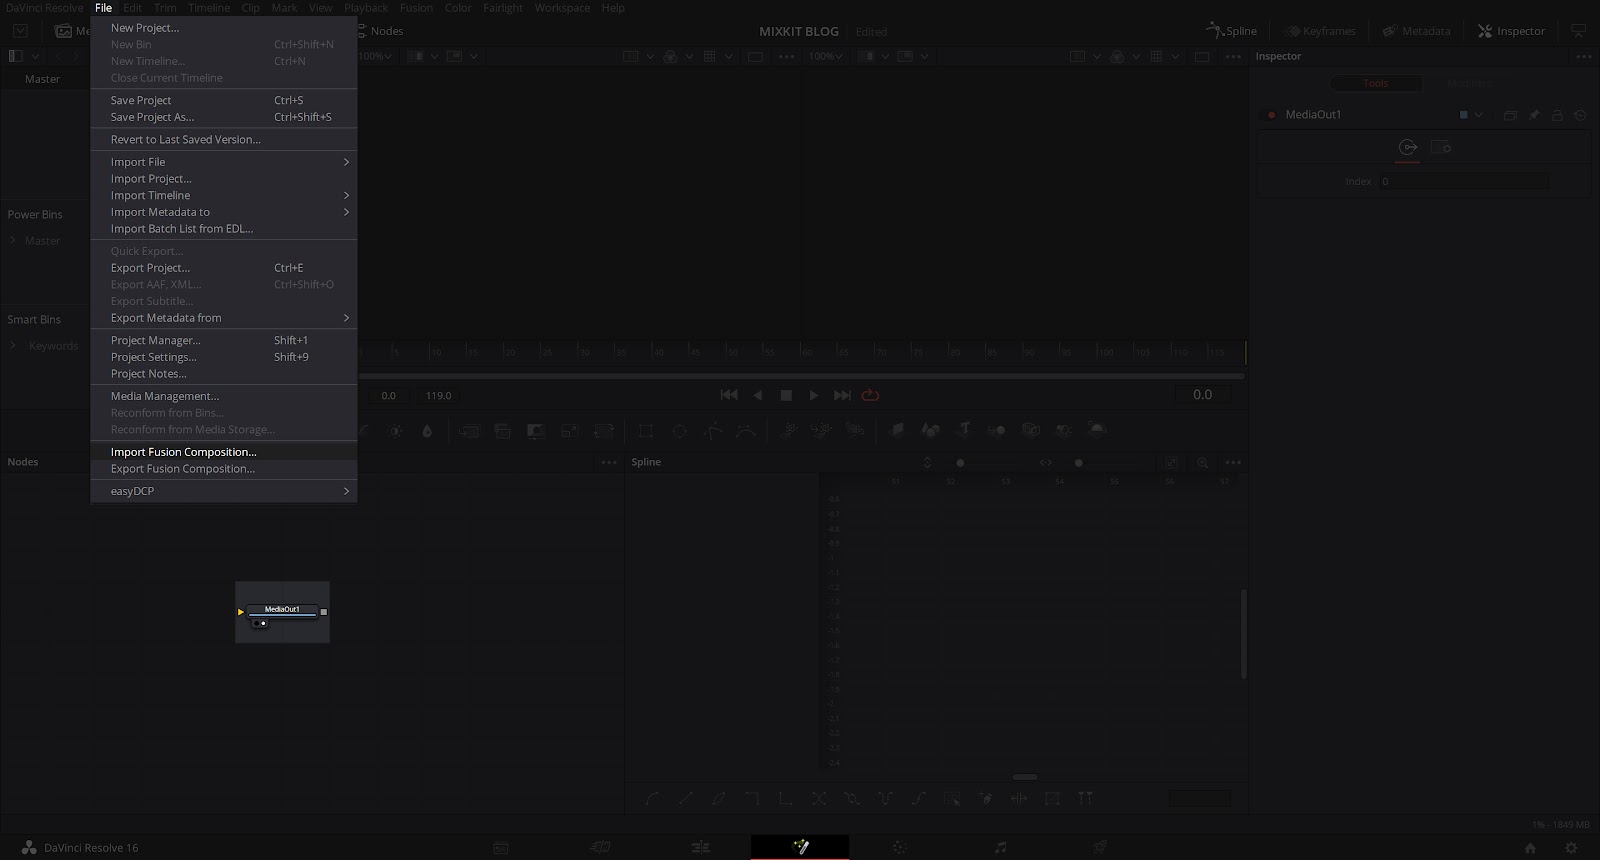
This will open up the file browser. Simply navigate to where you saved the asset folder, downloaded from Mixkit.co, and select the .comp file from within. We'll be using the Blithe Line Lower 3rd every bit an case.
Y'all'll at present see that the automatically generated node has been replaced by a full node tree. These are the layers of the composition. They're noted to aid you identify the different parts of the design, which node to select, and in some cases where to replace our own demo content with your own images and video. Which volition vary depending on the nugget. Now that you have the .comp imported. We tin can start editing!
How to edit .comp files in DaVinci Resolve
Now that we accept our Fusion Composition created, our .comp file imported and our eyes firmly fixed on the Fusion page. We can get-go editing our nodes. To go you familiar with the interface, node construction, and editing in general. We'll exist editing the 3 main features of this lower 3rd. The principal heading text, the tagline below, and the color of the animated line which acts as a mask for the text animation.
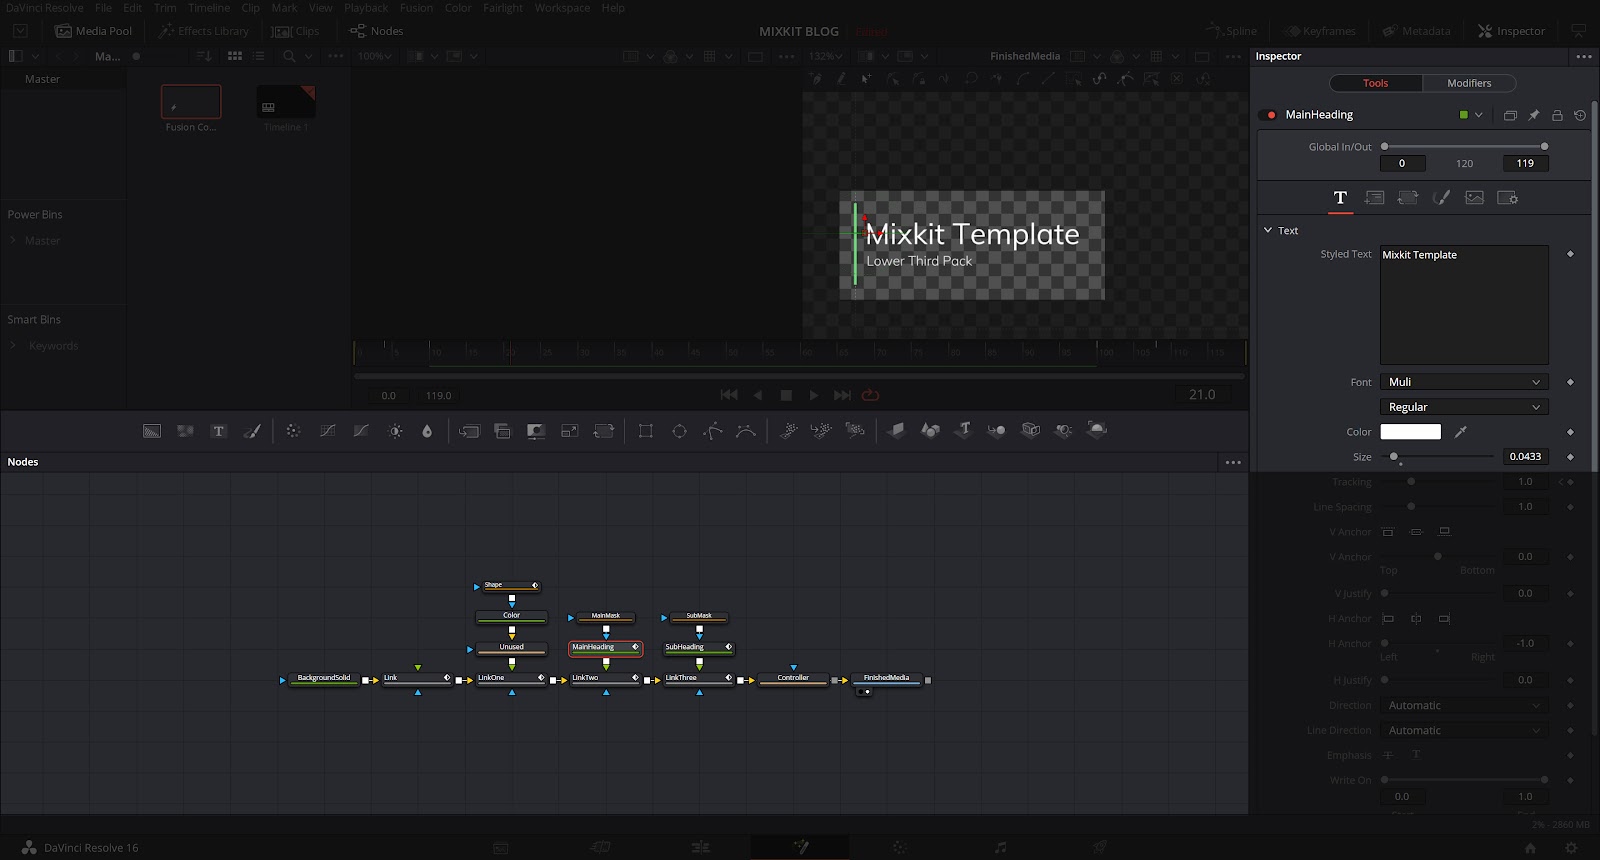
Click on the node called "MainHeading", and view the inspector to the correct of the user interface. You'll now see the settings for this node outlined here. This panel acts as a control panel for all settings specific to the node you have selected. Simply replace the existing text with your own. It will update in the preview window. Equally this is a text node you tin as well edit the font, sizing, and color here. Alongside other more than advanced features.
Repeat the process, this fourth dimension clicking on the "Subheading" node. As this is as well a text node you'll find the options in the inspector are identical to the principal heading text.
Finally, permit'south update the color of the solid shape layer which creates the mask for this lower 3rd. In the node tree, you'll run into nosotros accept a shape layer to the top-left of the main heading node. This is our mask, which forms the shape, and just below it, you'll see we accept a node called color. Click the color node and view the inspector.
Changing the color in DaVinci Resolve
This time we have some different options but they're simply as like shooting fish in a barrel to understand. Here you tin use the color picker to update the color of the shape background. By default, it's but a solid color. However, if yous want to be more than creative, you can choose from other options under the "Type" driblet-down menu. Peradventure add together a gradient instead?

Nosotros're near finished
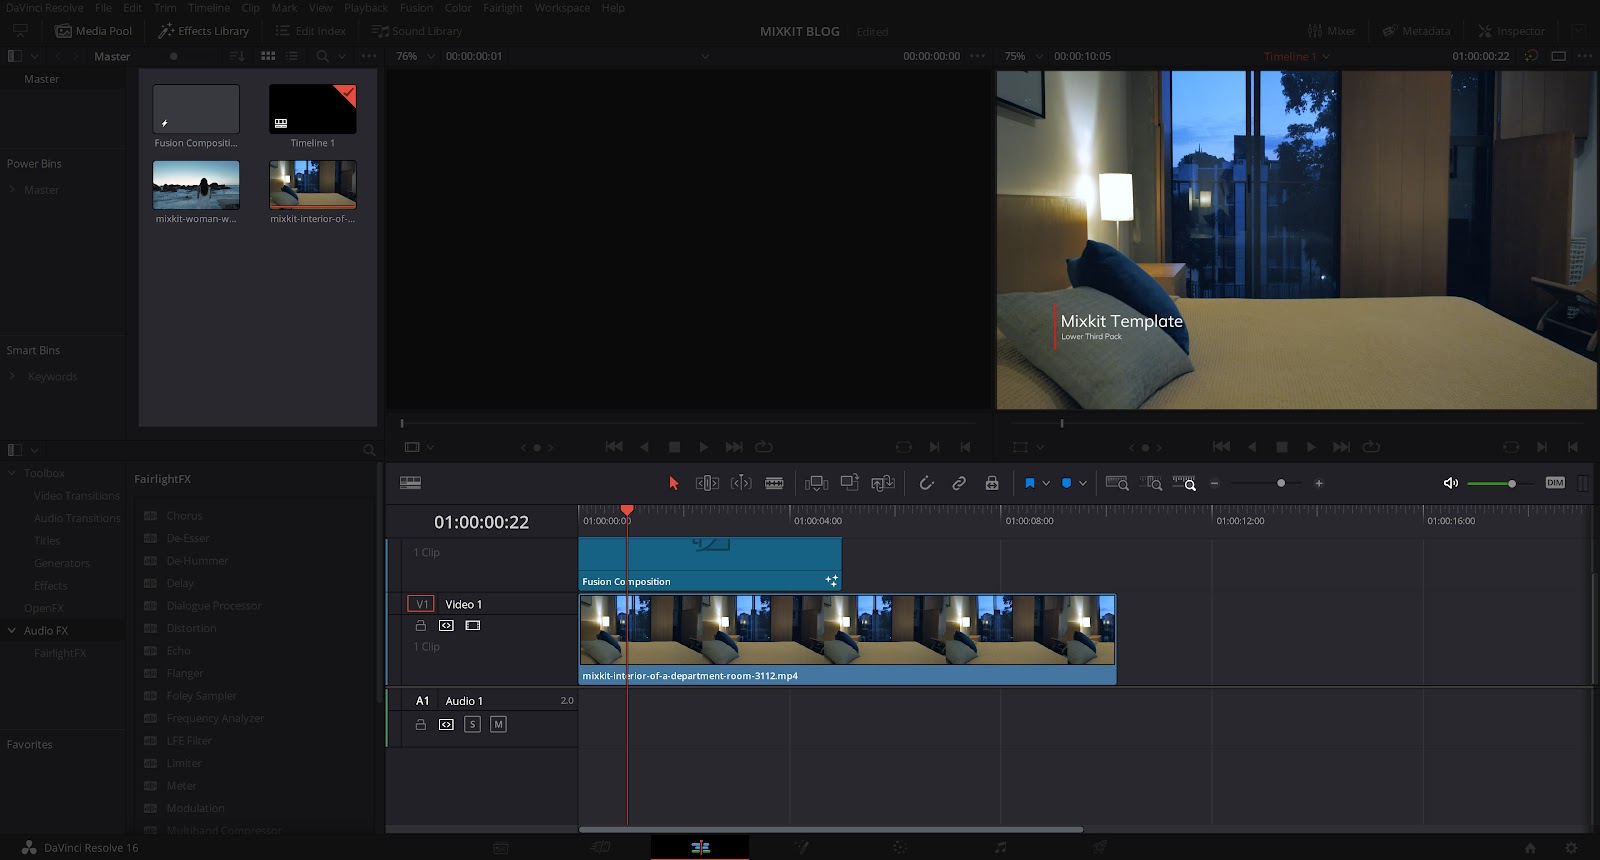
At present that we've edited the composition. It'south time to caput back to the edit interface of DaVinci Resolve. This time you'll notice the preview is not empty and your newly edited lower tertiary is sitting against a night background.
Adding a video to the timeline
If you lot want to add together a video. Click on the Fusion Composition in the timeline and elevate it up to a new line. Next, accept your favorite video and drag information technology to the line where your limerick was. If you're unsure what video to choose, why not caput back to our stock video library and browse for a new video?
Importing (.drp) DaVinci Resolve projects
If you've downloaded a DaVinci Resolve asset from Mixkit.co, it's possible that you've encountered a .drp file. If you're new to DaVinci this may be a bit confusing but don't worry. These are only the main project file extensions for DaVinci Resolve. If your figurer recognizes it as a DaVinci file you'll exist able to double-click information technology and it will open in the software by default. If not you can import this from within the user interface. Navigate to File and then choose Import Projection from the drop-downward menu.

Importing transitions for DaVinci Resolve (.drp)
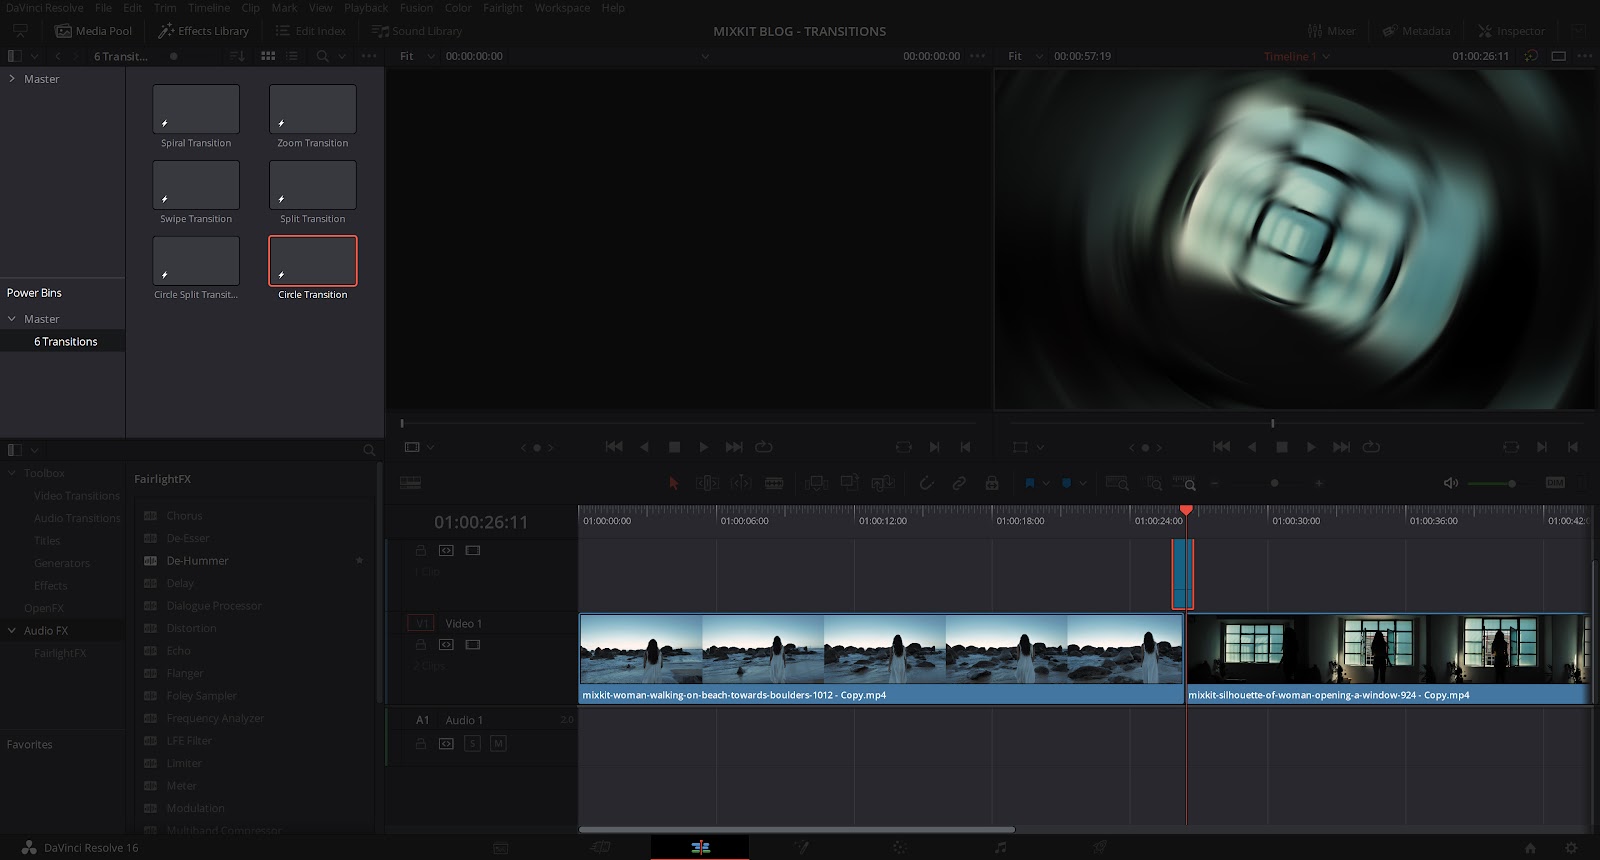
Amid the various assets that nosotros offer for DaVinci Resolve, you'll find some transitions. These are simple Fusion Compositions independent within a project file. Once downloaded, open the project file and navigate to the edit interface of DaVinci, then browse the media pool. Here you'll see your chosen transition.
Yous'll want to open the ability bins. If you lot can't see these already, head up to the summit navigation bar and choose View before selecting "Show Power Bins" from the dropdown. This will add together the bin interface for y'all. From here you need to drag and drop the transition limerick from the media pool into the Chief Bin. This will let yous to access information technology from other projects.

Using the transition in DaVinci Resolve
Equally the transitions are Fusion Compositions. All you need to practise is drag the transition from the Main Bin onto the timeline. To a higher place two clips that you wish to transition betwixt.
That's a wrap on this introduction to Fusion Compositions and project files in DaVinci Resolve and all that's left is the render button. Click that rocket ship and relish your free DaVinci Resolve asset from Mixkit.co. Explore more of our DaVinci Resolve library of free templates here.


Source: https://mixkit.co/blog/how-to-install-fusion-comp-files-for-davinci-resolve/
Posted by: rosexyle1976.blogspot.com
0 Response to "How To Download And Install Davinci Resolve"
Post a Comment